.Net Core provides a new cross-platform tool-chain for developing .NET applications which are nothing but the .Net CLI tools.
CLI tools are really powerful and easy to use, as a developer we should know how to use these commands.
These commands would be very useful if you are looking for creating Continuous Integration(CI) and\or Continuous Deployment(CD).
In this post, I will explain how to create, restore, clean, build, run .Net Core application using latest CLI commands.
What are CLI tools?
As per Microsoft site:
The .NET Core command-line interface (CLI) is a new cross-platform toolchain for developing .NET applications. The CLI is a foundation upon which higher-level tools, such as Integrated Development Environments (IDEs), editors, and build orchestrators, can rest.
CLI tools are cross-platform tool and can be used in Windows, MAC or Linux. Visual Studio internally uses this CLI to restore, build and publish an application.
.Net CLI tools are generally shipped with .Net Core installation so if you have installed .Net Core, you can use CLI tools.
If you do not have .Net Core installed, you can download .Net Core from here.
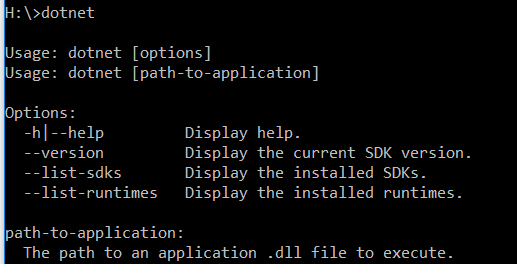
Check whether you have dotnet CLI installed
Open command prompt and type dotnet, if everything is installed correctly, it should give logs as below:
DotNet CLI syntax
DotNet CLI commands are really easy to use.
Command syntax has generally 3 parts:
- The driver(dotnet)
- The command (Or a verb)
- The arguments and\or options
For example, if you wish to create the project in C# language, you can write below command:
dotnet new console -lang C#
Here:
- dotnet is the driver
- new is the command
- console is the argument
- -lang is the option
List of available commands
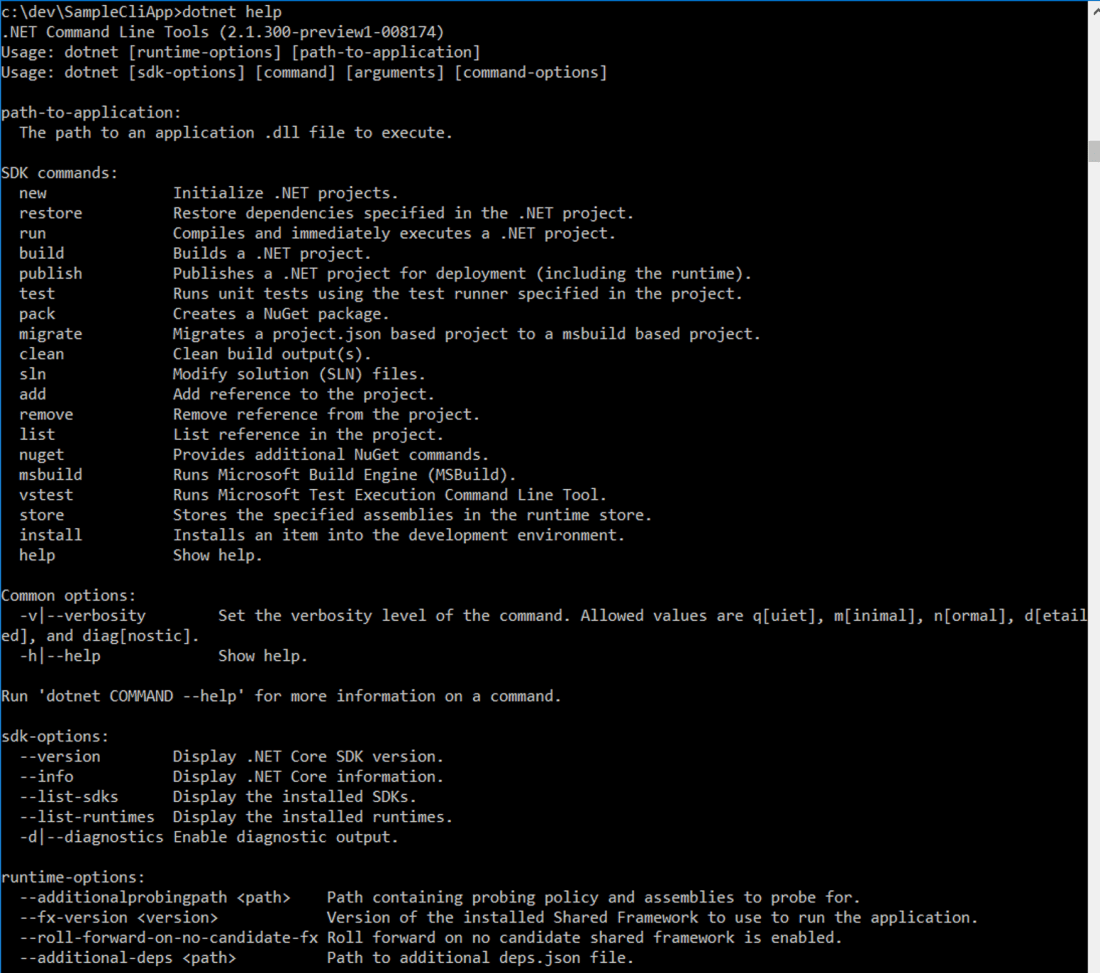
Before start writing the commands, you should have a look at all available commands. You can write help command to list the details as shown below:
dotnet help
Create new project using CLI
Create a folder under anywhere in C drive and change directory to that path in Command prompt:
cd C:\dev\SampleCliApp
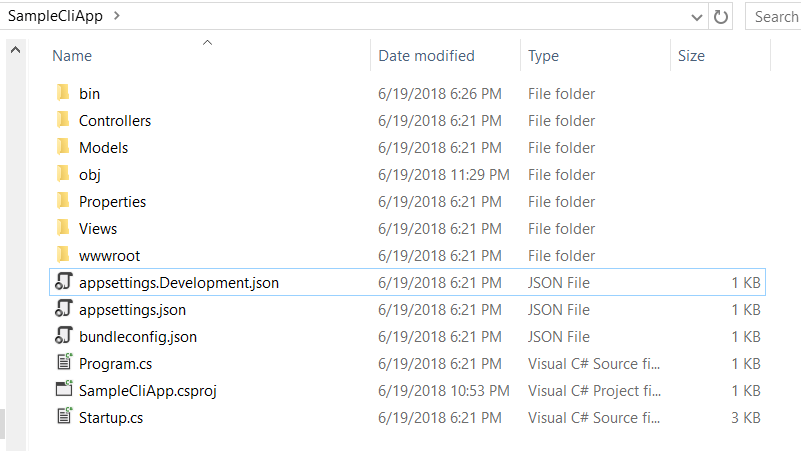
Run dotnet new command to create new .Net Core application, we will create an MVC project so we will run below command:
dotnet new mvc

This will create brand new .Net Core MVC project on mentioned location:
Note: You can use command dotnet new -l to list down all available template options
Restore command
Once the application is created, let us run restore command which will restore the packages if they are not available on your local machine:
dotnet restore

restore command internally calls Nuget.exe to restore the tree of dependencies.
Sample application is very small but for big application, restore plays a big role.
Clean and Build
Once the packages are restored, let us clean and build our project using CLI
For cleaning, use clean command as shown below:
dotnet clean

Important Note: dotnet clean will clear everything under the folder bin\Debug\netcoreapp2.x, it will not clear everything under bin and\or obj folder. More details here: https://github.com/dotnet/cli/issues/7240
For building the project, use build command as below:
dotnet build

This will build the project and will put dlls and other built files under bin\Debug\netcoreapp2.x
Run the application
We can run the application by running run command as shown below:
dotnet run

run command first calls build to make sure the targets are built and then runs the target application.
As you can see in the logs, the application is running on https://localhost:5001

DotNet Help for command details
We have already seen Help command above, but if you need help specifically for specific commands then you can use -h.
For example you want to see all arguments\options available for command build then write below command:
dotnet build -h

You can find all details for all commands with -h
In future post, I will explain how to manage Nuget packages along with creating and publishing our own Nuget packages using CLI commands.
We will also use the commands which we used above into a Jenkins pipeline to create the CI.
Hope it helps.

I found it useful to use with installing localdotnet cli tools
This file contains hidden or bidirectional Unicode text that may be interpreted or compiled differently than what appears below. To review, open the file in an editor that reveals hidden Unicode characters.
Learn more about bidirectional Unicode characters
dotnet-install.cmd
hosted with ❤ by GitHub
This file contains hidden or bidirectional Unicode text that may be interpreted or compiled differently than what appears below. To review, open the file in an editor that reveals hidden Unicode characters.
Learn more about bidirectional Unicode characters
DotNetCliVersion.txt
hosted with ❤ by GitHub
LikeLike
Thanks for the information buddy. It is useful.
LikeLiked by 1 person
Thanks for tthis
LikeLike