
Note – You can find the source code of my sample application here.
You can find all .Net core posts here.
In my previous post on IdentityServer4, I explained how to set up an Auth server and also created a client. You can find the post here.
I would request you to go through this previous post before reading this post.
In this post, let us secure an API using IdentityServer4.
So, in this article:
- We will create an API and will secure the API’s controller with Authorize attribute
- We will also add the logic for consuming the token from the Auth server in the API
- Then we will modify the client(which we have created in the previous post) to call the API using the token generated by the Auth server
- At the last, we will get the claims from the API into our client’s console if the token is validated. Thus the API is accessed but in a much-secured way
Interesting right? Let us start.
API
Right click on solution -> Create New Project -> Select Core Web application:
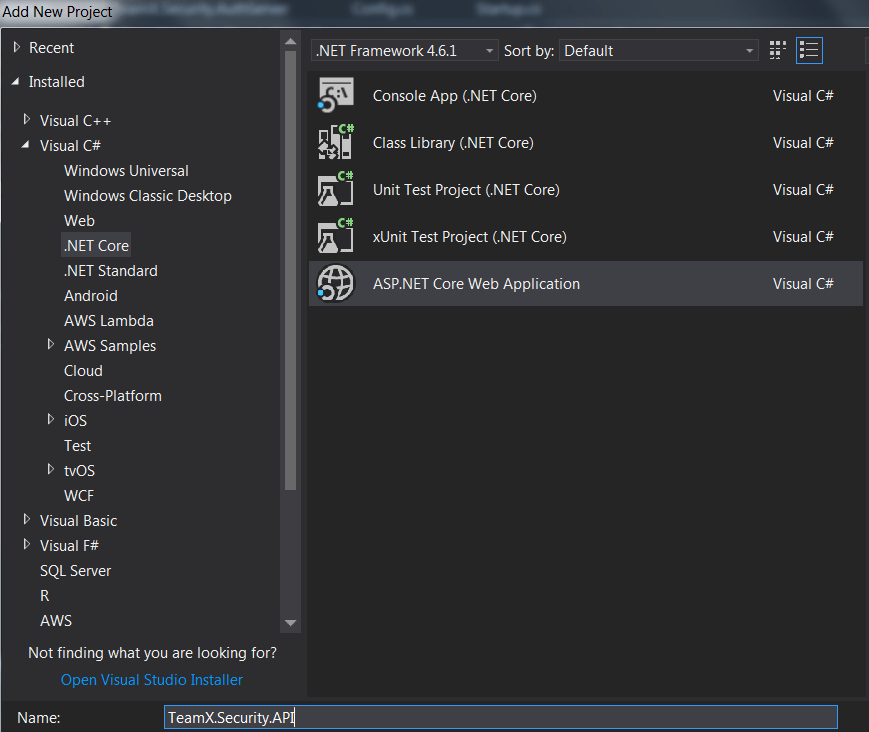
Click on Ok and in next window, select Web API project as shown below:

As we want to secure our APIs by the tokens, our API needs to be able to consume the tokens from the Auth server and restrict the users accordingly. Hence we will need the functionality which will do this process for us.
For this, we need to install IdentityServer.AccessTokenValidation in the application. This is an authentication handler to validate JWT and reference tokens from IdentityServer4
Open Nuget and search with IdentityServer.AccessTokenValidation -> click on install:

Once the package is installed, we will create a controller which we will secure by adding the Authorize attribute. We will allow only those users to access the API which sends the correct access token.
Let us create an IdentityController which will return the claims of the user once called.
Add below code in the IdentityController:
using System.Linq;
using Microsoft.AspNetCore.Mvc;
using Microsoft.AspNetCore.Authorization;

namespace TeamX.Security.API.Controllers
{
[Route("[controller]")]
[Authorize]
public class IdentityController : Controller
{
[HttpGet]
public IActionResult Get()
{
return new JsonResult(from c in User.Claims select new { c.Type, c.Value });
}
}
}
Here we have:
- Added an Authorize attribute which will be used to restrict the users from accessing the controller
- Added a Get method which will be used to retirive the user’s claim
Next step is to add the authentication in the Startup.cs class of the API project. here we are adding the details required for the Identity Server.
Add below code in the ConfigureServices method:
public void ConfigureServices(IServiceCollection services)
{

services.AddMvcCore()
.AddAuthorization()
.AddJsonFormatters();

services.AddAuthentication("Bearer")
.AddIdentityServerAuthentication(options =>
{
options.Authority = "http://localhost:5000";
options.RequireHttpsMetadata = false;

options.ApiName = "api1";
});

}
Here we have:
- Added the authentication using AddAuthentication which will add the authentication services to DI and configures Bearer as the default scheme
- AddIdentityServerAuthentication adds the IdentityServer access token validation handler into DI for use by the authentication services
We have specified the Auth server details.
Now let us add UseAuthentication in the Configure method:
public void Configure(IApplicationBuilder app)
{
app.UseAuthentication();

app.UseMvc();
}
UseAuthentication adds the authentication middleware to the pipeline so authentication will be performed automatically on every call into the host.
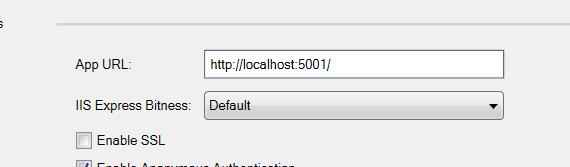
The last step is to set the port of API project to 5001 as shown below:
That is it. It is time to test everything together.
Before running our project, we need to make changes in the client which we created in the previous post. We need to add the logic to call our API by sending the token which will be generated from the Auth server.
Add below code in the client:
// call api
var client = new HttpClient();
client.SetBearerToken(tokenResponse.AccessToken);

var response = await client.GetAsync("http://localhost:5001/identity");
if (!response.IsSuccessStatusCode)
{
Console.WriteLine(response.StatusCode);
}
else
{
var content = await response.Content.ReadAsStringAsync();
Console.WriteLine(JArray.Parse(content));
}
Here we are:
- Creating the HTTPClient and setting the bearer token which we got from the Auth server
- We will call the API hosted on 5001 port and will call Identity controller
- API will match the tokens and if the user is authorized, the API will allow the request to enter into the controller’s Get method
- The user’s claim will be returned to the client
Whole Client code would look like below:
using IdentityModel.Client;
using Newtonsoft.Json.Linq;
using System;
using System.Net.Http;
using System.Threading.Tasks;

namespace TeamX.Security.Client
{
class Program
{
public static void Main(string[] args) => MainAsync().GetAwaiter().GetResult();

private static async Task MainAsync()
{
// discover endpoints from metadata
var disco = await DiscoveryClient.GetAsync("http://localhost:5000");
if (disco.IsError)
{
Console.WriteLine(disco.Error);
return;
}

// request token
var tokenClient = new TokenClient(disco.TokenEndpoint, "client", "secret");
var tokenResponse = await tokenClient.RequestClientCredentialsAsync("api1");

if (tokenResponse.IsError)
{
Console.WriteLine(tokenResponse.Error);
return;
}

Console.WriteLine(tokenResponse.Json);
Console.WriteLine("\n\n");

// call api
var client = new HttpClient();
client.SetBearerToken(tokenResponse.AccessToken);

var response = await client.GetAsync("http://localhost:5001/identity");
if (!response.IsSuccessStatusCode)
{
Console.WriteLine(response.StatusCode);
}
else
{
var content = await response.Content.ReadAsStringAsync();
Console.WriteLine(JArray.Parse(content));
}
}
}
}
Run and Test the application
As we want to start multiple projects together, we need to set multiple startup projects. For that, right click on the solution and open Properties -> Set as shown below:

Once everything is set, just start the application.
Both of the application(Auth Server and API) will be started and the console will be popped up:

As you can see above, there is a nice logging happening in the console. On the top, there is a suggestion which is as below:
You are using the in-memory version of the persisted grant store. This will store consent decisions, authorization codes, refresh and reference tokens in
memory only. If you are using any of those features in production, you want to s
witch to a different store implementation.
Once both the projects are running, let us start our client.
Once we run the client, the client will first request the token from the Auth server and the access token will be sent by the Auth server as shown below:

This token will be sent to API and if the token matches then the API’s Get method will be accessed.
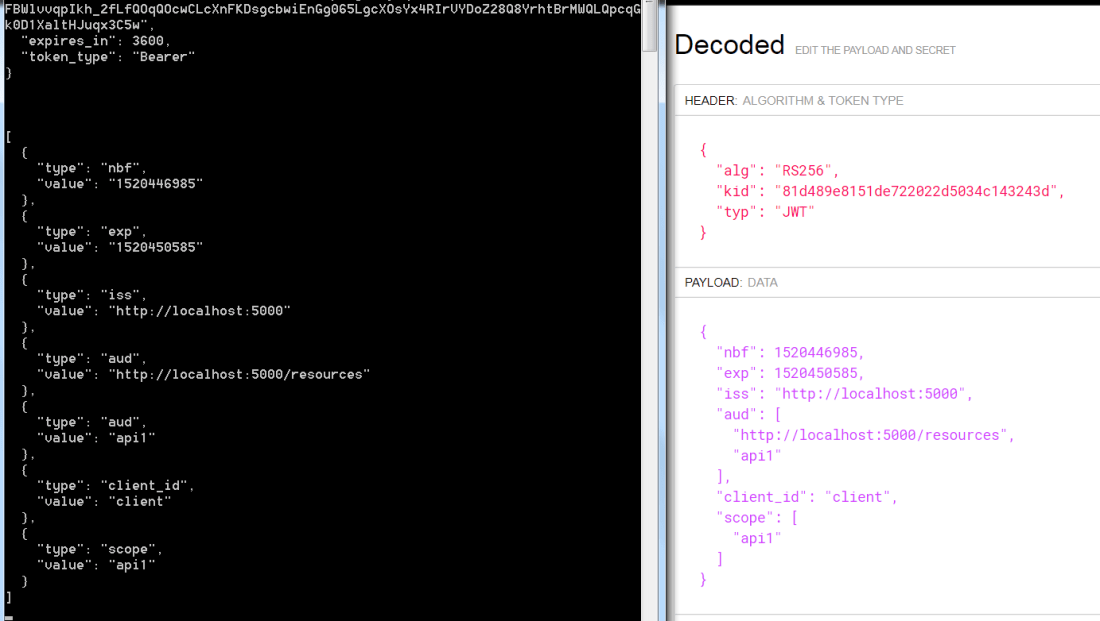
We can see the claims of the user as shown below:

Thus, the API will return the user’s claims:

You can confirm the claims by visiting the site – https://jwt.io/ . Provide the access token in the Encoded text box and it will return the claim details. As you can see below, both the values are matching – which means we have done the setup correctly:
In the future articles, we will use the .Net Core Identity with the IdentityServer4 and will also create an MVC client.
Note – You can find the source code of my sample application here.
Hope it helps.

Perhaps the best tutorial on .net core 2 with identity server 4.
LikeLike
Thanks a lot Srini, means a lot.
LikeLike
I read your articles with interest – When can we expect part 4 please?
LikeLike
Thanks a lot. I will try to publish it soon.
LikeLike
Thanks for your post Neel, I’ve learnt a lot from them.
Forgive the dumb question though but when you say “Once both the projects are running, let us start our client.”. I’m relatively new to VS 2017 and I can’t actually figure out once the API and Auth Server are running, how to then start the client?
I’ve had some success with dotnet run but some additional clarity on this would be great.
Thanks
LikeLike
Hey Ross. Thanks for the appreciation. To run the client while other projects are runnint, right click on the solution and open Properties -> Set as shown below: https://neelbhatt40.files.wordpress.com/2018/03/4-16.png . I have mentioned that in the post. Search with “Run and Test the application” here: https://neelbhatt.com/2018/03/04/step-by-step-setup-for-the-auth-server-and-the-client-identityserver4-with-net-core-part-ii/
LikeLike
Waiting for the next part, this is great. Could you explain how to use roles and also how to use alternative stores other than InMemory? Mybe SQL database
LikeLike
Thanks. I will try to write the next part soon.
LikeLike
Concise and easy to follow.
Your articles helped me understand IdentityServer quite easily.
Waiting for the next one.
Keep it up.
LikeLike
Hey Musaab, thanks a lot for your kind words.
LikeLike
Hi Neel! Thanks for this great blog. We’re still waiting for the next part.
LikeLike
where is the part 4.I have not find i anywhere.
LikeLike
Great article. can you please upload part4
LikeLike
Hi Neel,
I thank you for this blog.
It should be a silly question. I can’t figure out how to assign an User to a “Client”.
Let’s say I have 2 MVC apps (this app/client can call APIs controlled by IS4) and I have to manage the users (they can’t register themself).
I would like to allow user1 to access to MVC1 and MVC2, and user2 only to MVC1.
Could you please give me the big picture? 🙂 I’m really stuck.
LikeLike