
Note – You can find the source code of my sample application here. (Note that the code may contain extra code, concentrate on Auth Server and client for now)
You can find all .Net core posts here.
In my previous post on IdentityServer4, I explained the basics of IdentityServer4 which you can find here.
In this post, we will set up a sample Auth server along with a client which will request the token.
Let us start.
Auth Server setup
prerequisite:
- Visual studio 2017 community edition, download here
- .Net Core 2.0 SDK from here (I have written a post to install SDK here) (You can download the latest version, currently I am using 2.0 for this)
Create the Web application using .Net Core 2.0 template in VS 2017
Let us first add the blank solution and in that solution, we will add different projects:
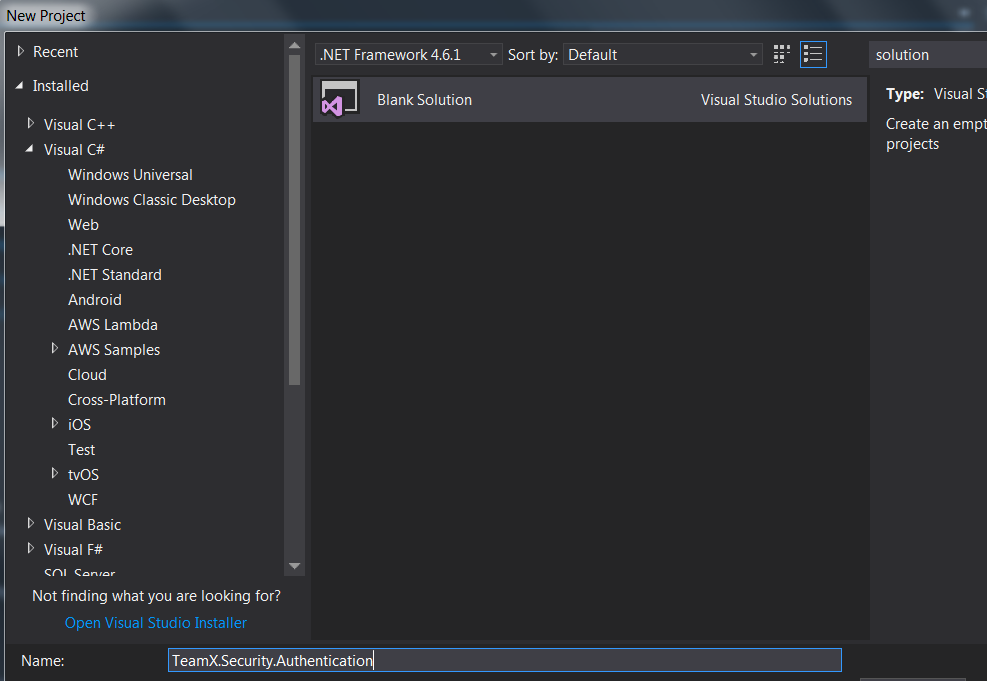
Once the solution is added, Right click on the solution -> Create New Project -> Select Core Web application:

Click on Ok and in next window, select Web Application(MVC) as shown below:

Visual Studio will create a well-structured application for you.
Next step is to install IdentityServer4 in your application.
Open Nuget and search with IdentityServer4 -> click on install:

Changes in Startup.cs class
Next step is to make changes in Configure and ConfigureService methods of Startup.cs class.
Configure method changes
Add app.UseIdentityServer(); in the Configure method which will add the middleware to the HTTP pipeline:
public void Configure(IApplicationBuilder app, IHostingEnvironment env)
{

app.UseIdentityServer();

//// Other code

}
UseIdentityServer allows IdentityServer to start intercepting routes and handle requests.
ConfigureService method changes
Now, add the necessary code in the ConfigureService method to configure and add the required services to the DI system:.
For now, we will use In Memory users, as well as clients and scopes:
public void ConfigureServices(IServiceCollection services)
{
services.AddMvc();

services.AddIdentityServer()
.AddDeveloperSigningCredential()
.AddInMemoryApiResources(Config.GetApiResources())
.AddInMemoryClients(Config.GetClients());
}
Here we need to add below services along with AddIdentityServer:
- AddInMemoryClients covers which clients are allowed to use this Auth server
- AddInMemoryApiResources covers which APIs are allowed to use this Auth server
- AddDeveloperSigningCredential which is for signing the tokens
Please note that there are other services as well which can be added here but for this sample above services are enough.
Add Config class
As you can see above, we will require Config class which will be used to write all methods required above.
Let us add new class Config.cs and add below code into the class:
using IdentityServer4.Models;
using System.Collections.Generic;

namespace TeamX.Security.AuthServer
{
public class Config
{
// clients that are allowed to access resources from the Auth server
public static IEnumerable<Client> GetClients()
{
// client credentials, list of clients
return new List<Client>
{
new Client
{
ClientId = "client",
AllowedGrantTypes = GrantTypes.ClientCredentials,

// Client secrets
ClientSecrets =
{
new Secret("secret".Sha256())
},
AllowedScopes = { "api1" }
},
};
}

// API that are allowed to access the Auth server
public static IEnumerable<ApiResource> GetApiResources()
{
return new List<ApiResource>
{
new ApiResource("api1", "My API")
};
}
}
}
Here we have:
- We have added a client with ID “client”, so whenever a client with Id “client” calls the Auth Server, our server will respond the request with the sha256 token
- For now, we have added only one simple client, later we will add different other clients
- GetClients method gets the list of clients which are allowed to use this Auth server
- GetApiResources method gets the list of APIs which are allowed to use this Auth server
We are almost done with the AuthServer, one last thing we need to change is the port number. Change it to 5000 as shown below:
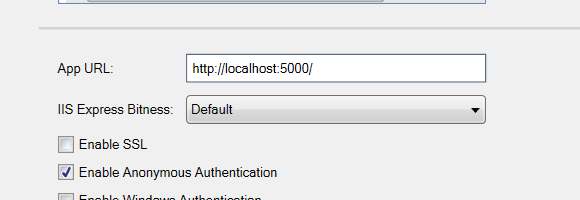
I would encourage to use HTTPS but for this sample project we are using HTTP.
That is it. You have just created brand new Auth server using IdentityServer4.
Run the application. Now the server is ready to take requests from the client with id “client”
You can see the OpenId configuration by running below URL:
http://localhost:5000/.well-known/openid-configuration
It will return something like below:

This is called OpenID Connect Discovery Document.
And this detail contains:
- Location of various endpoints (For example the token endpoint and the end session endpoint)
- The grant types the provider supports
- The scopes it can provide and some more
Let us create a sample Client with the Id “client” which is allowed to use our Auth server.
Client
Right click on solution -> Create New Project -> Select Console App(.Net Core):

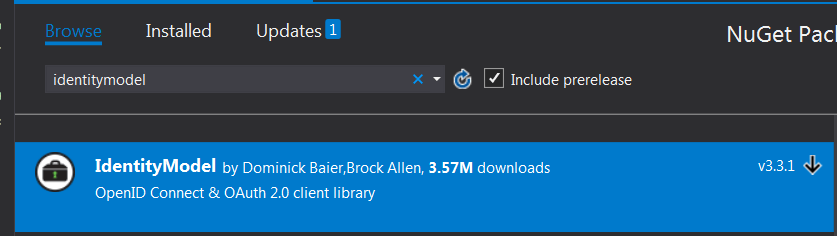
Next step is to install IdentityModel in your client application.
Open NuGet and search with IdentityModel -> click on install:
Add below code in the Program.cs class:
sing System.Threading.Tasks;
using IdentityModel.Client;
using System.Net.Http;
using Newtonsoft.Json.Linq;

namespace TeamX.Security.Client
{
public class Program
{
public static void Main(string[] args) => MainAsync().GetAwaiter().GetResult();

private static async Task MainAsync()
{
// discover endpoints from the metadata by calling Auth server hosted on 5000 port
var discoveryClient = await DiscoveryClient.GetAsync("http://localhost:5000");
if (discoveryClient.IsError)
{
Console.WriteLine(discoveryClient.Error);
return;
}

// request the token from the Auth server
var tokenClient = new TokenClient(discoveryClient.TokenEndpoint, "client", "secret");
var response = await tokenClient.RequestClientCredentialsAsync("api1");

if (response.IsError)
{
Console.WriteLine(response.Error);
return;
}

Console.WriteLine(response.Json);

}

}

}
Here we are:
- Discovering the endpoints by calling the auth server hosted on 5000 port
- Once we have the endpoints, we are creating Client Token which contains the endpoints, ClinetId(in our case it is “client”) and client secret
- Once the TokenClient is created, we will request the token from the auth server
- Once the server sends the token, we will convert to json and will show in the console
Make sure your host is already running on port 5000 and then run the client.
Once you run the client, Auth server will send the token back to the client as you can see below on the Console screen:

This is nothing but the access token which you can use for anything you want.
The token is returned as a JWT. If we want to decode this token then go to https://jwt.io/ and paste the access token there. It will return something like below:
HEADER:ALGORITHM & TOKEN TYPE

{
"alg": "RS256",
"kid": "81d489e8151de722022d5034c143243d",
"typ": "JWT"
}
PAYLOAD:DATA
{
"nbf": 1520141076,
"exp": 1520144676,
"iss": "http://localhost:5000",
"aud": [
"http://localhost:5000/resources",
"api1"
],
"client_id": "client",
"scope": [
"api1"
]
}
In my next article of IdentityServer4, we will see how to secure the API using the token we generated using Auth Server.
Note – You can find the source code of my sample application here. (Note that the code may contain extra code, concentrate on Auth Server and client for now)
Stay tuned.

Hi Neel, Still I am not clear in IndentityServer4, My question is Auth Server running in 5000 port and at the same time how to run client project. need to run multiple start project from the solution properties?.
LikeLike
Hey, For that, right click on the solution and open Properties -> Set as shown below: https://neelbhatt40.files.wordpress.com/2018/03/4-16.png . I have mentioned that in the post. Search with “Run and Test the application”
LikeLike
Hi Neel, Really nice article, did you write a part III to “see how to secure the API using the token we generated using Auth Server”?
LikeLike
Hello Tom. Yes, part III is here: https://neelbhatt.com/2018/03/08/web-api-security-with-identityserver4-identityserver4-with-net-core-part-iii/
LikeLike
Thanks for the article, but your sample code for the client is all fugged up. No indents make it hard to follow and raw html is displaying (i.e. public static void Main(string[] args) => MainAsync().GetAwaiter().GetResult();)
LikeLike
Thanks for noticing it, I will update it soon
LikeLike
Can I test this using postman?
LikeLike
You can check this: https://medium.com/all-technology-feeds/testing-your-asp-net-core-webapi-secured-with-identityserver4-in-postman-97eee976aa16
LikeLike
Thank your very much. Grate post. I have one query.
In the sample code which you shared implemented Access tokens to authorize webAPI’s? Can you please let me how can we achieve centralized authentication using Identity token ?
LikeLike
Hey, Thanks a lot. you can have a look here: https://neelbhatt.com/2018/03/08/web-api-security-with-identityserver4-identityserver4-with-net-core-part-iii/
LikeLike
By the way IdentityServer4 is used to implement the centralized authentication. You can have a look here: https://neelbhatt.com/2018/02/24/identityserver4-in-simple-words-identityserver4-with-net-core-part-i/
LikeLike
Anyone following this now, instead of using DiscoveryClient and TokenClient, use the extension methods on HttpClient GetDiscoveryDocumentAsync and RequestClientCredentialsTokenAsync instead.
LikeLiked by 1 person