
Note – You can find the source code of my sample application here.
Whenever you start creating an application, one of the most important modules is the authentication.
In this article, I will explain how to add Login functionality to your .Net Core 2.0 application using .Net Core Identity,
Let us first see what is ASP .Net Core Identity?
ASP.NET Core Identity is a membership system which allows you to add login functionality to your application. Users can create an account and login with a user name and password or they can use an external login provider such as Facebook, Google, Microsoft Account, Twitter or others.
Let us create .Net Core 2.0 application with Core Identity step by step
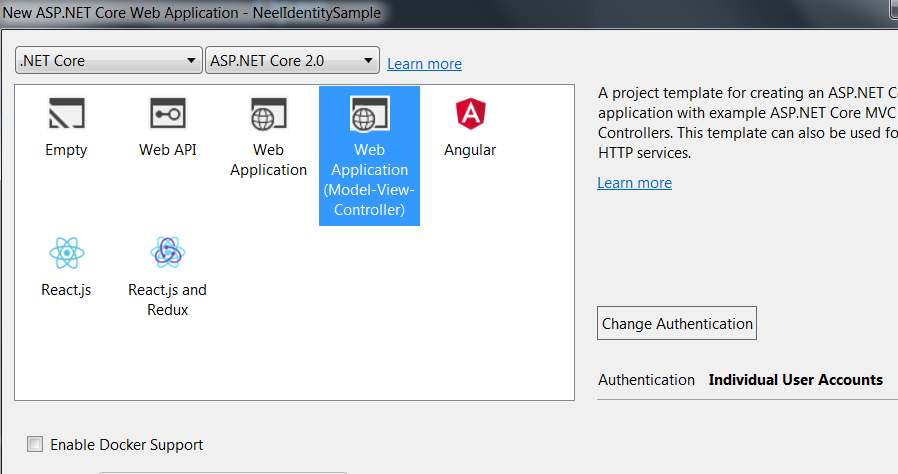
First open Visual Studio 2017 -> Create New Project -> Select Core Web application

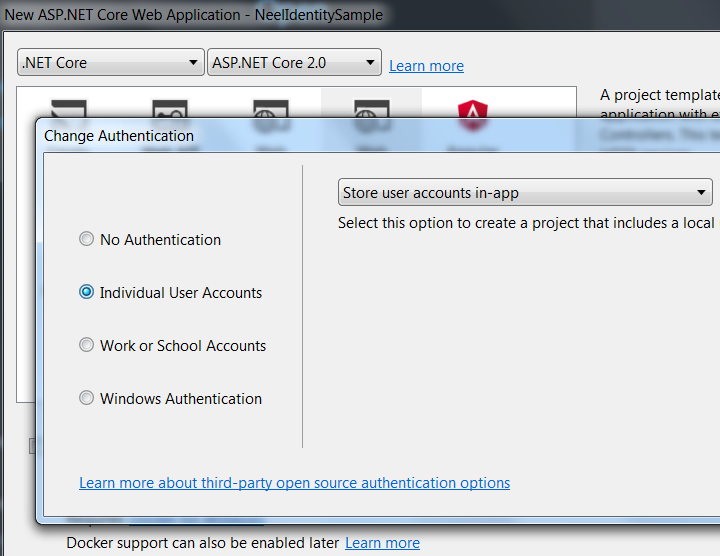
In next window, click on Change authentication link and select Individual User Accounts. By this, we are selecting the FormAuthentication.
Then select Web Application(MVC):
Visual Studio will create a well-structured application for you:

Let us see some major classes in the application
Controllers
HomeController – For Home, About, Contact pages
AccountController – For Login, Register, ForgotPassword etc with
ManageController – For Change Password, manage profile, to add two-factor authentication etc
Data
ApplicationDBContext along with different migration scripts to create different tables in the database
Extensions
Helper extension class for Email confirmation Link, Reset password callback etc
Models
Different view models for:
- Account(Login, Register etc)
- Manage(ChangePassword, EnableAuthentication etc)
- ApplicationUser
- ErrorViewModel
Services
For example Email Send service
Views
Views for Account, Manage, Home, About, Contact etc
application.json
This is something new in .Net Core than regular MVC application. Instead of config class now we have json class.
Here the connection string for the aspnet user table resides:

bundleconfig.json
This is also something different than regular MVC class. This class is used for bundling and minification.
Now open Startup.cs class and add below configuration code in the ConfigureService method.
The services.AddIdentity method adds the default identity system configuration for specific user and role and we will add configuration settings for different Identity options:
// This method gets called by the runtime. Use this method to add services to the container.
public void ConfigureServices(IServiceCollection services)
{
   services.AddDbContext<ApplicationDbContext>(options =>
   options.UseSqlServer(Configuration.GetConnectionString("DefaultConnection")));

   services.AddIdentity<ApplicationUser, IdentityRole>()
   .AddEntityFrameworkStores<ApplicationDbContext>()
   .AddDefaultTokenProviders();

   services.Configure<IdentityOptions>(options =>
   {
     // Password settings
     options.Password.RequireDigit = true;
     options.Password.RequiredLength = 8;
     options.Password.RequireNonAlphanumeric = false;
     options.Password.RequireUppercase = true;
     options.Password.RequireLowercase = false;
     options.Password.RequiredUniqueChars = 6;

     // Lockout settings
     options.Lockout.DefaultLockoutTimeSpan = TimeSpan.FromMinutes(30);
     options.Lockout.MaxFailedAccessAttempts = 10;
     options.Lockout.AllowedForNewUsers = true;

     // User settings
     options.User.RequireUniqueEmail = true;
     });

    services.ConfigureApplicationCookie(options =>
    {
       // Cookie settings
      options.Cookie.HttpOnly = true;
      options.Cookie.Expiration = TimeSpan.FromDays(150);
      options.LoginPath = "/Account/Login"; // If the LoginPath is not set here, ASP.NET Core will default to /Account/Login
      options.LogoutPath = "/Account/Logout"; // If the LogoutPath is not set here, ASP.NET Core will default to /Account/Logout
      options.AccessDeniedPath = "/Account/AccessDenied"; // If the AccessDeniedPath is not set here, ASP.NET Core will default to /Account/AccessDenied
      options.SlidingExpiration = true;
    });

    // Add application services.
    services.AddTransient<IEmailSender, EmailSender>();

    services.AddMvc();
}
Here we have written the code to add some basic password rules like it should be more than 8 characters, it required digit, it requires at least one Uppercase character etc.
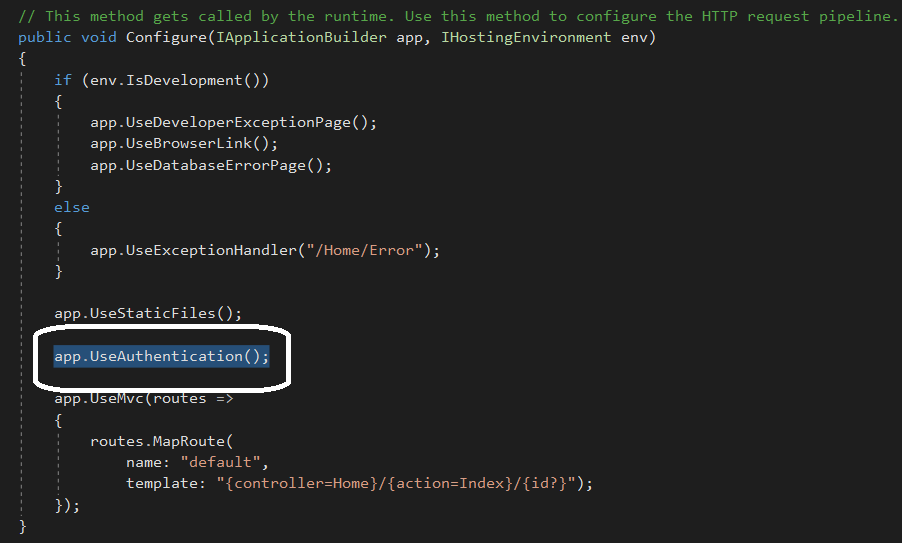
Once this is done, we will enable the Identity in the application by calling UseAuthentication in Configure method as shown below:
Once this is done, open appsetting.json class and change the ConnectionString and apply your server\DB instance name as below:

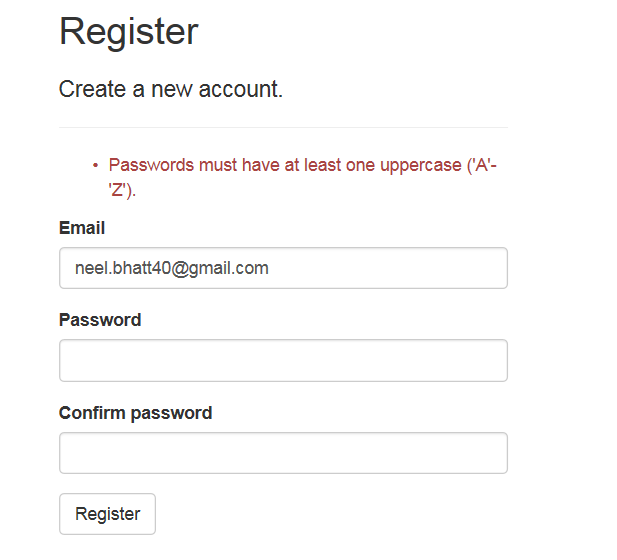
We can test our Identity changes now. Run the application on IISExpress and click on Register.
If you will not provide the password as per our configuration, it will show the message as below:
Enter the correct password and click on Register.
If this is the first time you’re performing this action, you may be required to run migrations. The application prompts you to Apply Migrations:

Click on Apply Migrations and give the details again.
Once you click on Register link, the Register action is invoked on AccountController. The Register action creates the user by calling CreateAsync on the _userManager object which is provided to AccountController by dependency injection:

Once the user is registered, you can open SQL Database and you can see the database would be created for our application:
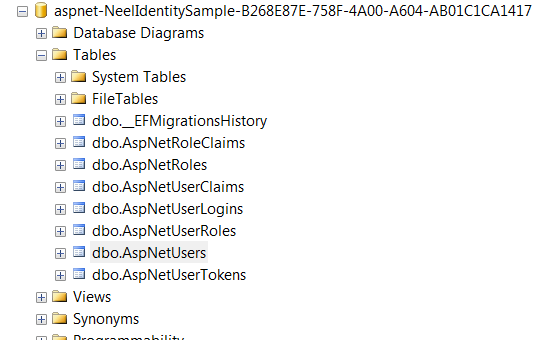
You can find registered users under AspNetUsers table.
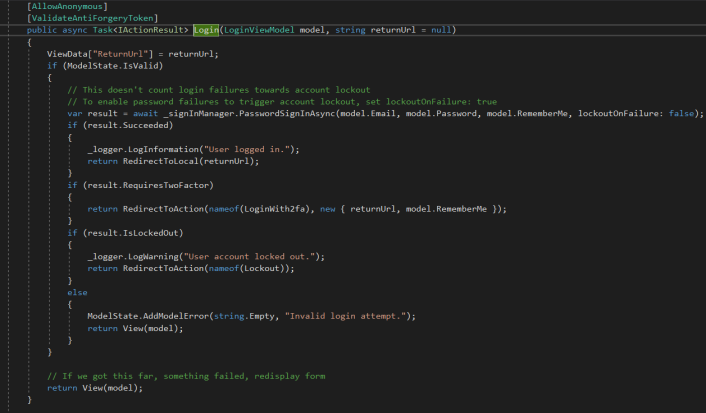
Similarly, Login method will be called when user logins and it will internally call PasswordSignInAsync on the _signInManager object which is provided to AccountController by dependency injection:
Once the user is registered\LoggedIn, user claim cookie named AspNetCore.Identity.Application would be created as shown below:

The Logout method will be called when the user logs out and it will internally call the _signInManager.SignOutAsync method:

The SignOutAsync method clears the user’s claims stored in a cookie. As you can see below, the cookie is wiped out when the user logs out:

Two Factor Authentication
You can even add two-factor authentication.
For example in sample application when you click on the User Name, it will open Manage page, click on Two-factor authentication:

When you click on Add Authenticator app, EnableAuthenticator(Get) will be called which will internally call GenerateQrCodeUri:

GenerateQrCodeUri will generate the code which then can be added in the Authenticator application as mentioned below:

Basically, when the user downloads the application and applies this key, the application will generate verification code which needs to be filled here.
When you click on Verify button, it will call EnableAuthenticator method in ManageController which will internally call VerifyTwoFactorTokenAsync, which will verify the toke against the token which is stored against your username when you downloaded the authenticator application:
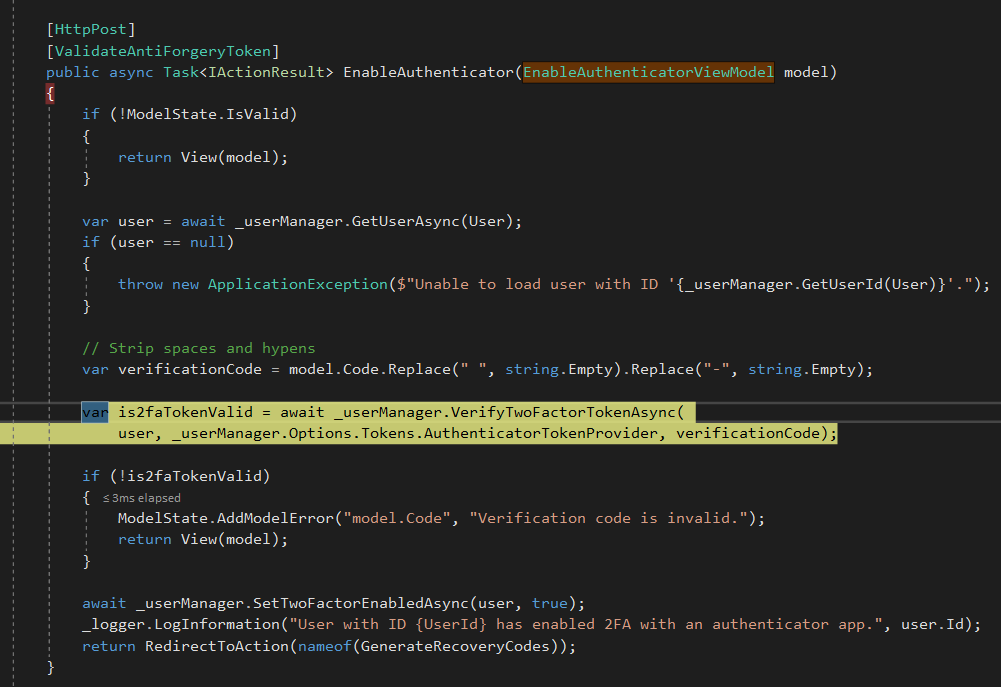
Once, the token is verified, the user can use token generated in the application, thus tow factor authentication.
We can add different other two-factor authentication as well. For example for SMS based, have a look here.
Important – In my next post, I will explain IdentityServer4 to secure .Net Core 2.0 API using OAuth 2 client credentials.
Note – You can find the source code of my sample application here.
Hope it helps.

Reblogged this on Razin's Tech blog.
LikeLike
Thanks for the thorough walk-through. Looking forward to your follow-on post about IdentityServer4.
LikeLike
Sure, I will update soon. Thanks 🙂
LikeLike
Hi,
You selected MVC template for this. Can I achieve this authentication using Angular template. I want to create a web app on .Net core with Angular in front end and include authentication also. Any response appreciated. Thanks.
LikeLike
Hey, for now there is no support for authentication while creating the Angular template. In future, there will be I guess.
LikeLike
Hi,
is there any chance you would write on how to do custom storage provider for asp.net identity?
I think that would help a lot of people..
LikeLike
Hey, sure I will get some time to write about custom storage provider for asp.net identity. Thanks for the suggestion.
LikeLike
Hi,
Have you implemented this without Entity framework.
LikeLike
Hey, I have not done that yet.
LikeLike
email confirmation is not working
LikeLike
Hey, what is the error you are getting?
LikeLike
using asp.net core 2.0 i was getting “Verification code is invalid.” after calling VerifyTwoFactorTokenAsync() using google authenticator to generate code from qrcode scan or entering in the key. Realized the 30 second expiration on the code might be the reason. the clock running the webapp server was off a few minutes. changed to exact time within seconds and it worked.
LikeLike
Hey Brad. I did not get your point. You faced this issue and you found the solution, that is what you meant right?
LikeLike