
Note – You can find the source code of my sample application here.
If you have ever worked with APIs then you might be familiar with Swagger, if you have not heard about Swagger then this post will help you to know the basic of Swagger and the steps to configure Swagger with yours .Net Core 2.0 application.
First of all, let us see what is Swagger
One liner for Swagger – UI representation of your RESTfull APIs
- Swagger is a set of rules (in other words, a specification) for a format describing REST APIs.
- The format is both machine-readable and human-readable.
- As a result, it can be used to share documentation among product managers, testers and developers, but can also be used by various tools to automate API-related processes.
For example, you have set of APIs and you want a proper documentation for these APIs, you can use Swagger. You can even test the API calls from Swagger and there is lot more can be done using Swagger, have a look here for more details.
In this post, we will see how can we use Swagger with .Net Core 2.0 application.
Step by step guide:
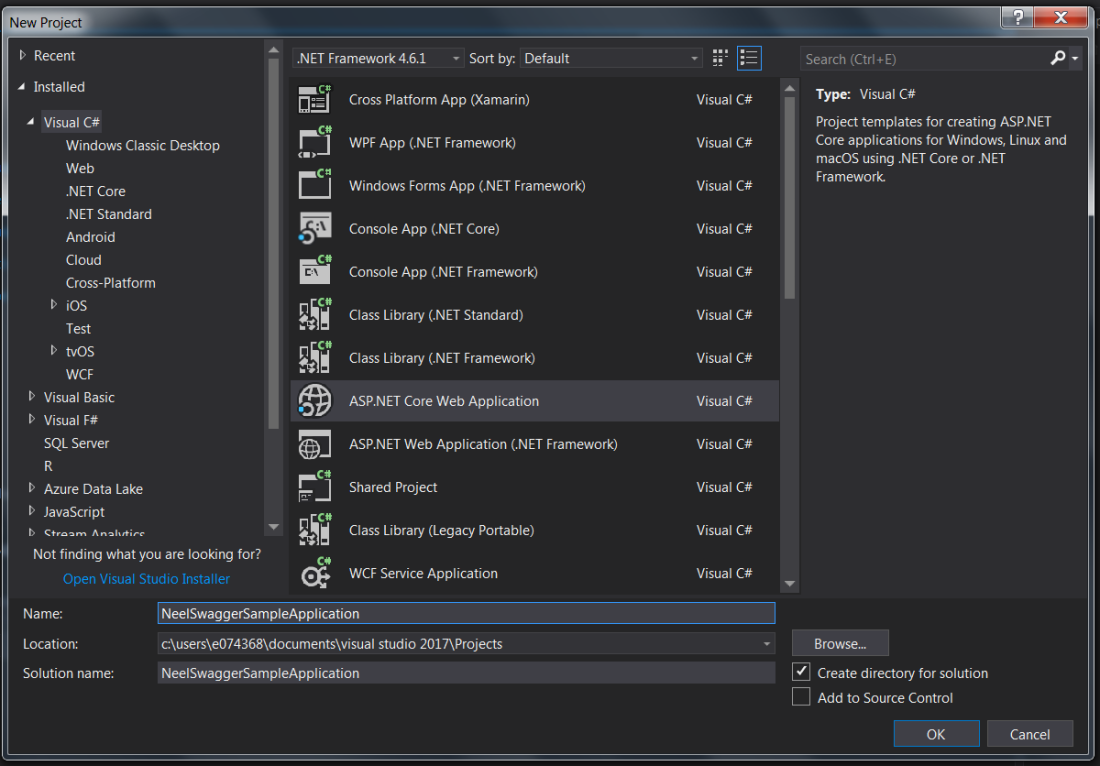
Open Visual Studio 2017 and Create New project – > Select Core Web application:
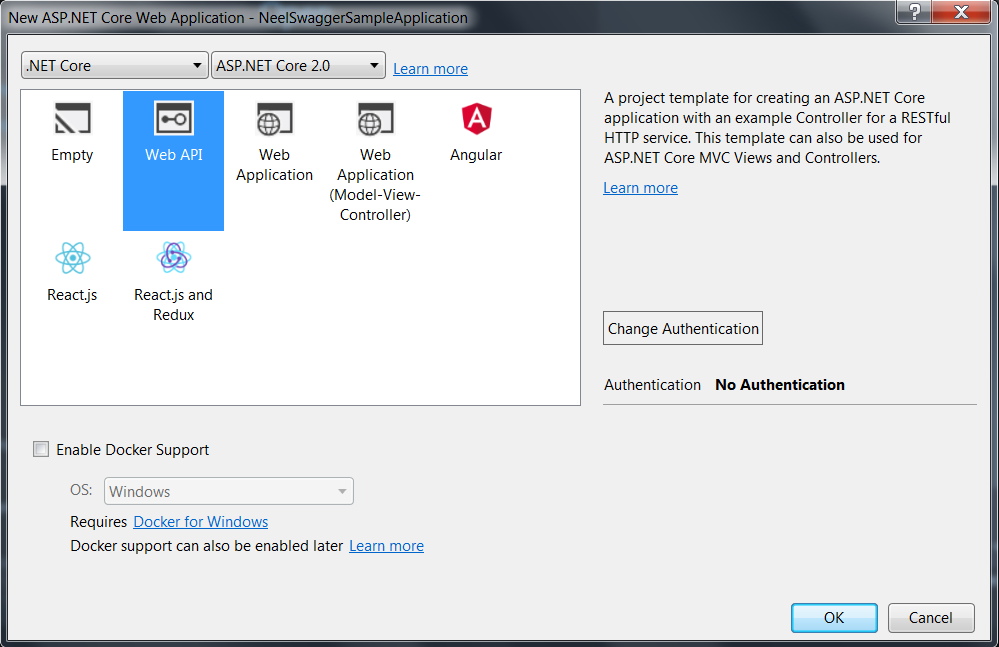
Click on OK, it will open new template window with different awesome templates. Select Web API:
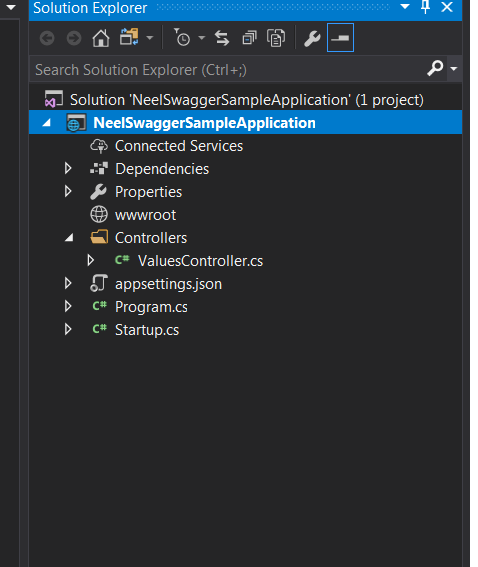
It will create the API project with the structure shown below:
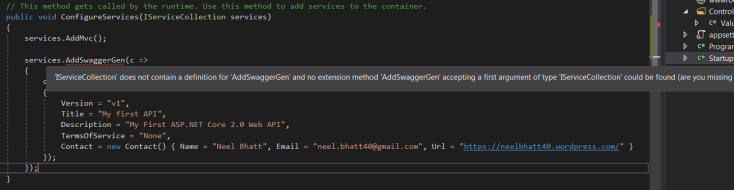
Let us add Swagger to the middleware. Open Startup.cs class and add below code to the ConfigureService method:
// This method gets called by the runtime. Use this method to add services to the container.
public void ConfigureServices(IServiceCollection services)
{
services.AddMvc();

services.AddSwaggerGen(c =>
{
 c.SwaggerDoc("v1", new Info
 {
  Version = "v1",
  Title = "My First API",
  Description = "My First ASP.NET Core 2.0 Web API",
  TermsOfService = "None",
  Contact = new Contact() { Name = "Neel Bhatt", Email = "neel.bhatt40@gmail.com", Url = "https://neelbhatt40.wordpress.com/"}
  });
 });
}
Once you add above code, an error will be shown because IServiceCollection does not contain the definition for AddSwaggerGen:
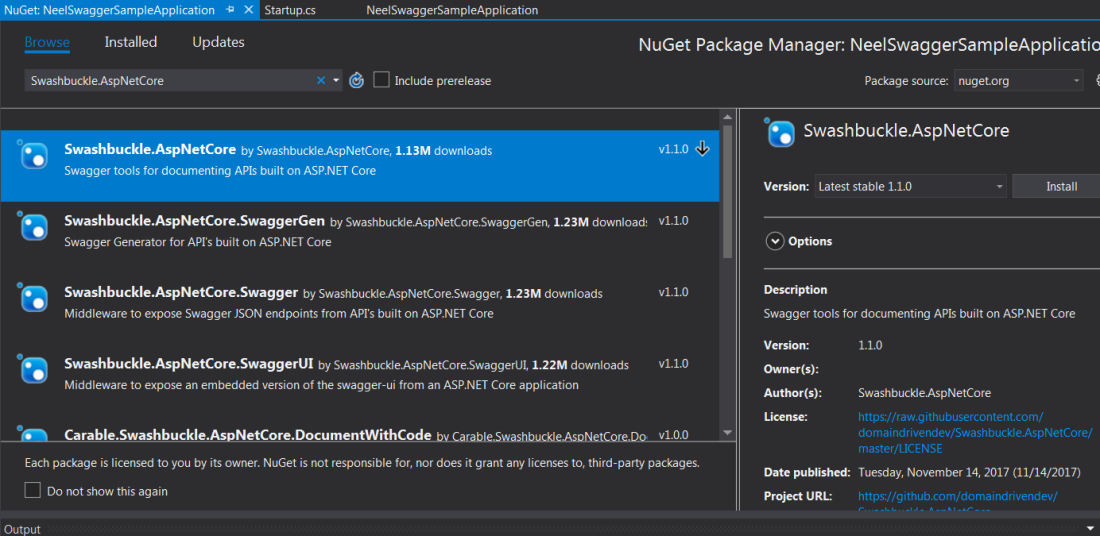
We will have to add Nuget package – Swashbuckle.AspNetCore to add this support which is used to add Swagger tools for documenting APIs built on ASP.NET Core.
Search Swashbuckle.AspNetCore in Nuget package manager and select the package as shown below:
Once you install the Nuget package, errors will be gone.
Once this is done, we will enable Swagger UI. Add below code in Configure method of Startup.cs class:
public void Configure(IApplicationBuilder app, IHostingEnvironment env)
{
 if (env.IsDevelopment())
 {
   app.UseDeveloperExceptionPage();
 }

 app.UseMvc();

 app.UseSwagger();
 app.UseSwaggerUI(c =>
 {
   c.SwaggerEndpoint("/swagger/v1/swagger.json", "My API V1");
 });
}
We are almost done and we have already enabled Swagger in the Core 2.0 application.
Last but not the least step, we will change the launch browser setting of the application and will tell the application to launch the Swagger when we run the application.
For these Open properties of the application -> Go to Debug tab -> Write swagger in the Launch browser text box:

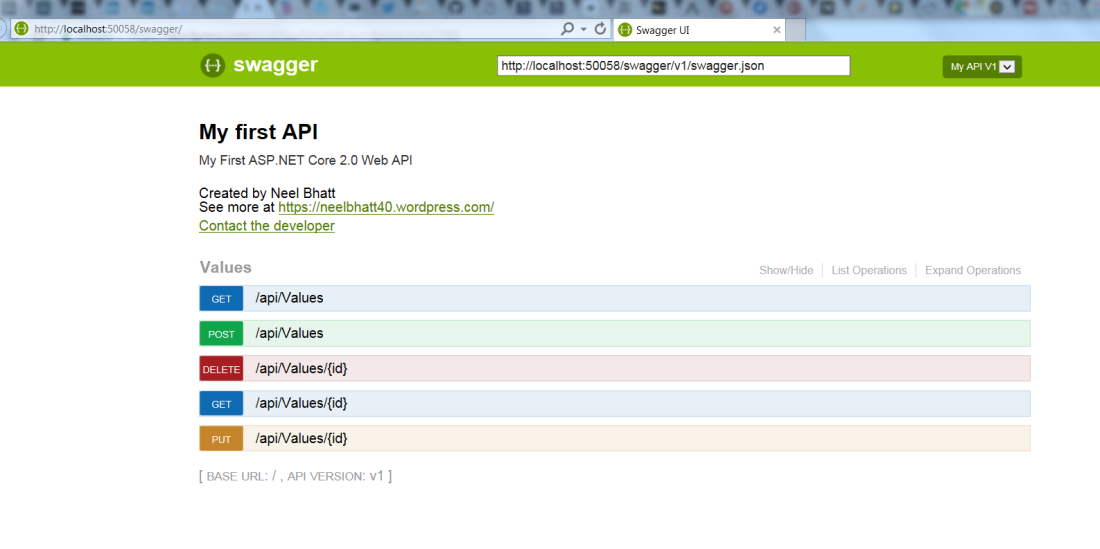
That is it. Just run the application and you will see beautiful colorful Swagger landing page as shown below:
Manage versions of APIs
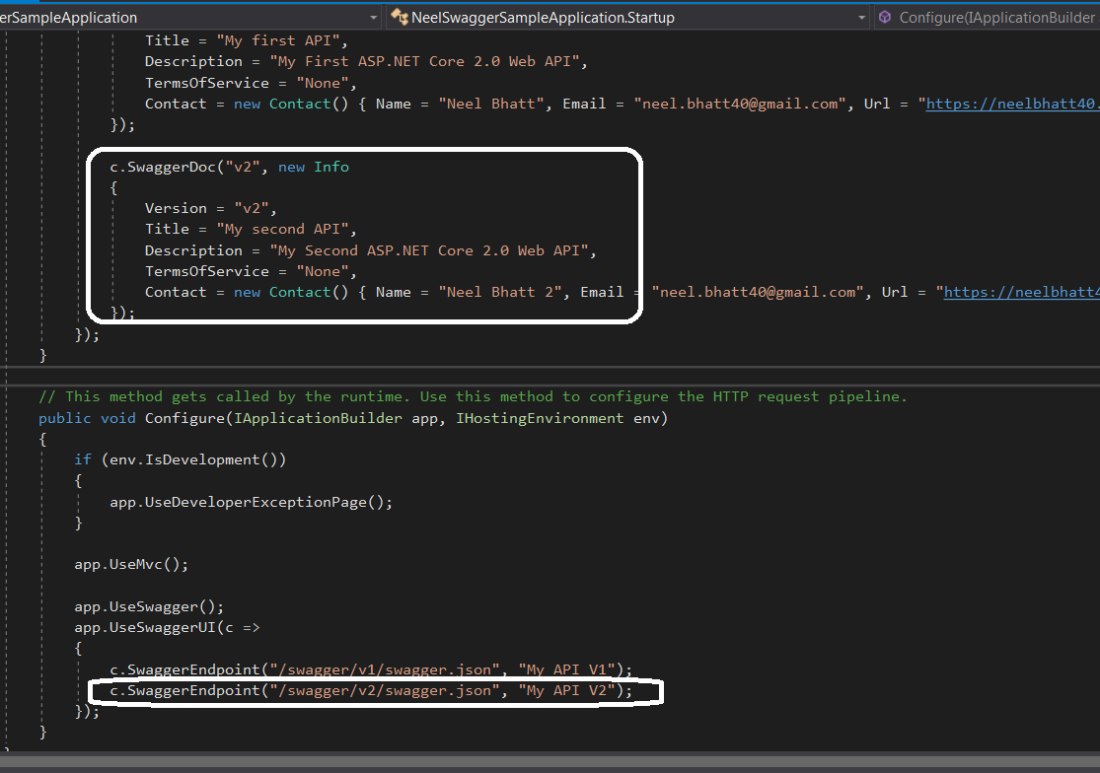
You can even manage different versions of your APIs, for example, you have v2 APIs as well and you need to enable that in Swagger then you just need to add a couple of steps.
First add new SwaggerDoc in ConfigureService method and then add new endpoint in Configure method in Startup.cs class as shown below:
Now just run the application and you can select different versions of your APIs by selecting the value from dropdown list as shown below:

XML documentation
We all are quite familiar with the XML document of the API, for example, you have hosted your APIs and you want to send the details of APIs to another team then you can simply pass XML document which contains all the details of the API like description, desired input, output etc.
Let us see how we can create XML documents with Swagger in .Net Core 2.0 application:
First of all, we need to enable XML support and once we enable the checkbox, the application will create an XML file in the bin\debug folder.
Open properties – > Open Build tab -> Enable check box XML documentation file as below:

Once this is done, we need to add below lines of code in the ConfigureService method which will include the comments into the XML file:
var basePath = PlatformServices.Default.Application.ApplicationBasePath;
var xmlPath = Path.Combine(basePath, "NeelSwaggerSampleApplication.xml");
c.IncludeXmlComments(xmlPath);
Now add some comments on any random method as shown below:

And when you build the solution, XML file would be generated in bin\debug folder. Open the XML file, it will show these comments:

Have a look at the Github page of Swagger UI if you want more information.
You can find the source code of my sample application here.
Hope it helps.

Thanks for sharing
LikeLike
You are welcome 🙂
LikeLike
This one is really helpful! Thank you.
LikeLike
Glad to know that you liked it.
LikeLiked by 1 person
very nice. Thanks a lot
LikeLike
Gald to know that you liked it 🙂
LikeLike
Well put together post. I am curious how you get the xml documentation for swagger when the code is build is built in release configuration.
Since the documentation is required to generate the Swagger UI, building and deploying in release will cause that documentation to be outputted to the bin/Debug/netcoreapp2.0 directory.
LikeLike
Hey Mattimus, I have not built the code in Release mode, I was building it in debug mode. Sorry if I have not got what you meant to say. May be you can elaborate more.
LikeLike
helpful post with step by step configurations
LikeLike
I am using GhosDoc from long time. Including swagger make things easy for me to generate document out of it. Thank you.
LikeLike
Anyway can you please explain me what is AddSecurityDefinition in below code
services.AddSwaggerGen(c =>
{
c.SwaggerDoc(“v1”, new Info { Title = IdentityServerConfig.ApiFriendlyName, Version = “v1” });
c.OperationFilter();
c.AddSecurityDefinition(“oauth2”, new OAuth2Scheme
{
Type = “oauth2”,
Flow = “password”,
TokenUrl = $”{applicationUrl}/connect/token”,
Scopes = new Dictionary()
{
{ IdentityServerConfig.ApiName, IdentityServerConfig.ApiFriendlyName }
}
});
});
LikeLike